This post is for Day 23 of Merpay Advent Calendar 2021, brought to you by @chris from the Merpay KYC team.
What’s this export thing about?
The KYC team is in charge of saving and retaining the personal information of our customers.
In order to comply with laws and regulations, we sometimes have to get the data out of the database and deliver records to the authorities.
Because personal information of customers is valuable and private, it is not just about dumping a database onto some file and sending it via email.
We must ensure the safety of the data from beginning to end.
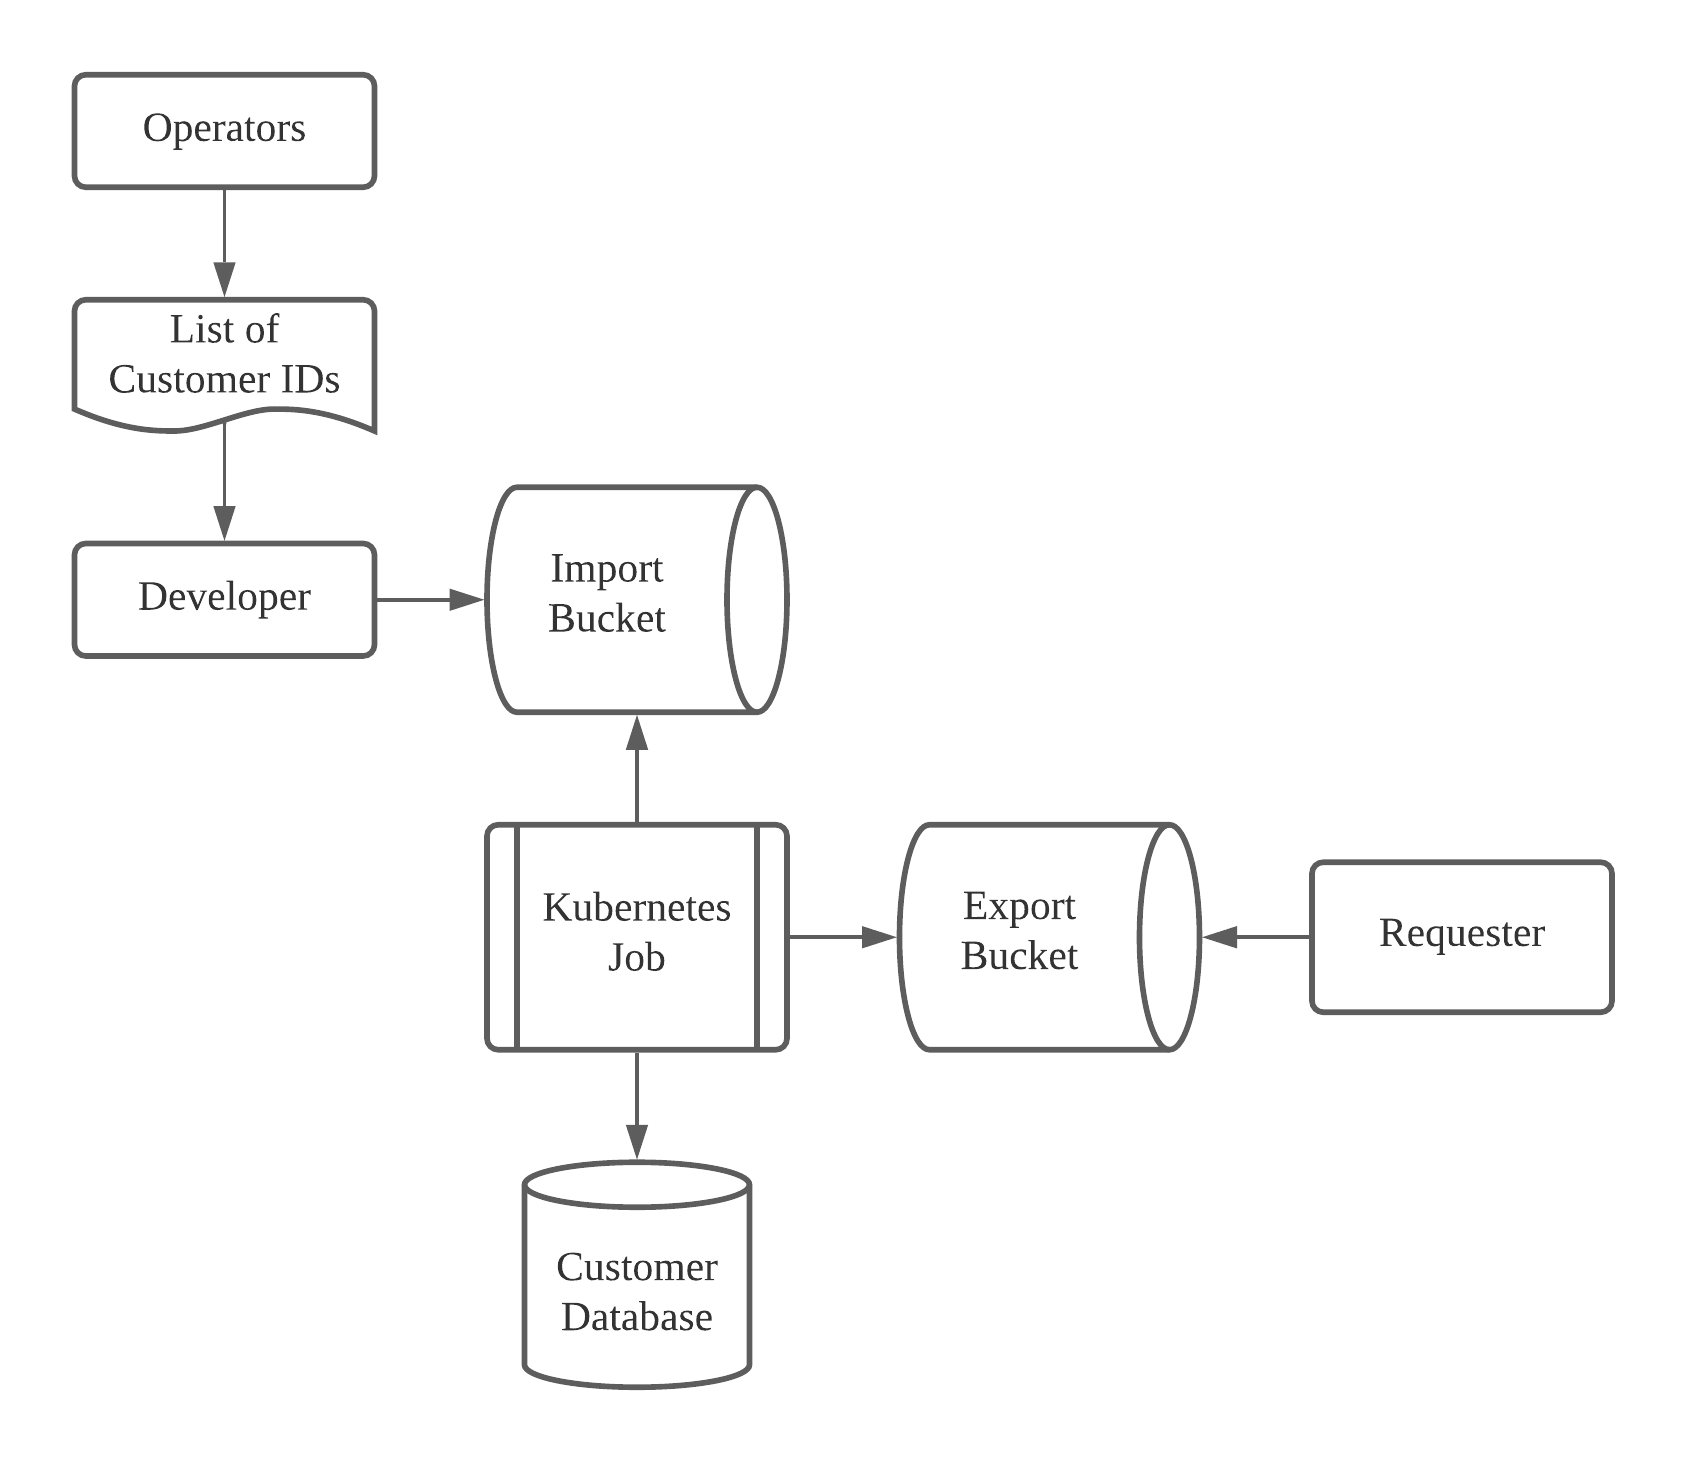
For that reason, at merpay, we use two different GCS buckets, as well as a bucket where the exported data would be.
Each of these buckets have different permissions assigned to them so as to limit the number of users who have access to its data to a minimum.
The import bucket only has write access.
Developers can upload data for any job to it but they may never read anything on it.
The export bucket can be written to but no data can be read.
Specific read permissions must be set on a per-user basis to a file.
We also set specific rules so that the data is deleted after time.
This is to prevent any data leak should the worst case scenario ever happen.
The reason we divided this operation into two different buckets is to be able to have fine granular control over which user has access to which resource.
We could have created two different directories inside one bucket and set specific permissions for each of them but we thought that it might make things hard to think about over a long period of time and we wanted to put the security provided by GCP to good use.
How does it work?

Above diagram explains what the usual pipeline is when it comes to the export of personal information.
We use terraform in order to manage our buckets.
The deletion of data is handled by having a lifecycle rule such as this one:
lifecycle_rule {
   action {
     type = "Delete"
   }

   condition {
     age = "7"
   }
 }
This particular rule is for the import bucket where we delete data after 7 days.
And we also handle who can import data on a per user basis:
resource "google_storage_bucket_iam_member" "usertest_is_pii_import_object_creator" {
 bucket = google_storage_bucket.import_bucket_dev.name
 role   = "roles/storage.objectCreator"
 member = "user:usertest@mercari.com"

 condition {
   title       = "expires_after_2021_12_24"
   description = "Expiring at midnight of 2021-12-24"
   expression  = "request.time < timestamp(\"2021-12-24T00:00:00Z\")"
 }
}
The upload of data to a bucket is done with the gsutil command.
It is provided by Google to handle operations on GCS buckets.
We also set ACLs (permissions) with this command.
Typically, the one ACL that we set would be the READ permission to the files we have exported.
Step 1: Generation of the list of customers
We take extra care about accessing only the minimum necessary data we need to, which is why the pipeline always starts by singling out a list of customers who fit some criteria.
Here are some examples of criterias we might use for some of our operations:
- Customers who have created an account between 1st of April 2021 and 1st of June 2021
- Customers who have succeeded an eKYC flow
- Customers who use a particular bank
Only a few operators can generate customer IDs based on a certain criteria.
They are tasked with generating the list of customer IDs and then provide the list to a developer from the KYC team who will upload the file to the import bucket using the gsutil command.
Step 2: Creation of batch process
The next step would be to pipe this list of customer IDs to the program.
We never allow a single employee to access data directly. For safety measures, all data manipulations are made through Kubernetes jobs that are reviewed by at least another employee.
Step 3: Decryption of personal information
Customer data in our database is completely encrypted.
The program will be tasked with decrypting the data and manipulating the output to whatever final format is appropriate for the task at hand.
The encryption of data is handled by KMS.
The usage of this product allows us to centralize our key management and rotate keys easily whenever we deem it necessary.

Above diagram, taken from KMS documentation, shows how the data is decrypted.
Steps 4 and 5: Save to the export bucket
Using the gsutil command again, we save the data generated by the job to the export bucket and set specific ACLs so that only the required users can access it. This is done as part of the Kubernetes job.
Here is an excerpt of a command in the job that we would use to upload the file and then set the ACL.
gsutil cp /tmp/program-output.csv gs://export-bucket-dev/ekyc_data/test-customer-list-211101-211201-result.csv

gsutil acl ch -r -u data-requester@mercari.com:READ gs://export-bucket-dev/ekyc_data/test-customer-list-211101-211201-result.csv
Step 6: Deletion of the data after a certain amount of time
As stated above, we have an automatic deletion of data but if the requester of the data is done with the file, we will delete the file manually from the export bucket.
In conclusion
This article talks about how we execute jobs in a certain way, in order to maintain security and avoid data leaks. I hope you found it interesting!
Tomorrow’s article will be by @miisan and @Enn. Look forward to it!


