This is a post for the Day 8th of Merpay Advent Calendar 2021 written by @tanakaworld from the Merpay Frontend team.
Introduction
Merpay, a financial service, has been constantly working on quality. The Frontend team started automating Regression Testing two years ago and Integration Testing this year. In this article, I would like to look back and summarize the policy and overall picture of test automation.
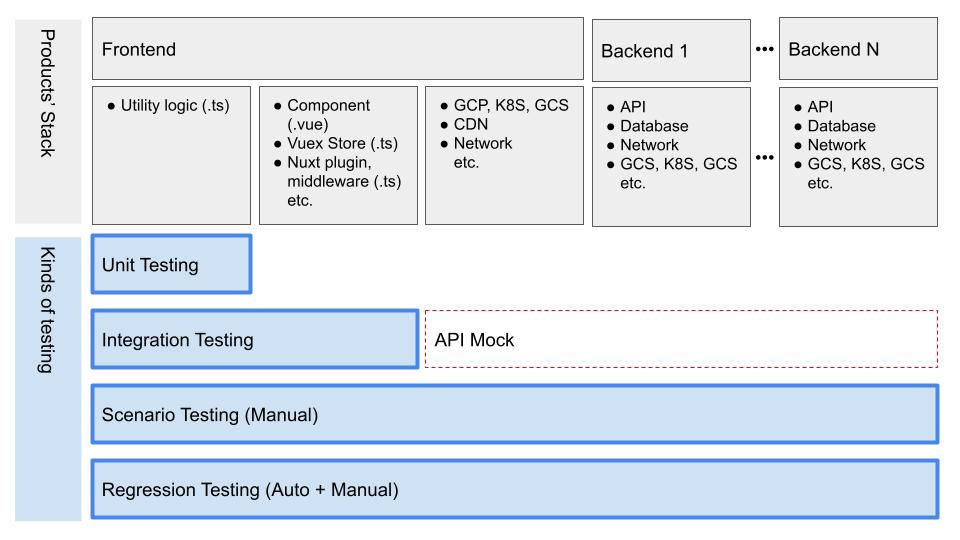
These are the kinds of testing that are performed for frontend. Let’s look into each one.
- Unit Testing
- Integration Testing
- Scenario Testing
- Regression Testing
1. Unit Testing
We use Jest for Unit Testing, and test the function logic written in TypeScript. Merpay Frontend generally uses Nuxt (Vue.js) and TypeScript for application development.
Key Points
We decide how and what test to write depending on whether the target is an application or a library.
Application
For applications, we generally do not write Unit Tests for Vue components and Vuex. This is because testing them tends to be testing the logic of the library itself you’re using while you should just be focused on testing your own functions. Those tests granularity would be too messy and maintainability would be lost.
Instead, we use Integration Testing to ensure that the application is working as expected. I will explain it later on in this article. We recommend placing independent functions in .ts files as much as possible to be able to easily write Unit Tests for them.
// Info.vue
<template>
  <div>
    Date: {{ formatGoogleDate(date) }}
  </div>
</template>

<script lang='ts'>
import Vue from 'vue';
import type { PropType } from 'vue';
import { formatGoogleDate, GoogleDate } from '~/utils';

export default Vue.extend({
  props: {
    date: {
      type: Object as PropType<GoogleDate>,
      required: true
    }
  },
  methods: {
    // Define a function outside of a component
    formatGoogleDate
  }
})
</script>
// utils.ts
export type GoogleDate = {
year?: number;
month?: number;
day?: number;
}
// Write Unit Tests for this
export function formatGoogleDate(date: GoogleDate) {
return `${date.year} / ${date.month} / ${date.day}`
}Shared Libraries
Things that are used by multiple applications are made into libraries and managed in our private npm registry. These include design systems with component implementations, API Clients, validation rules, and etc. In such cases, we use Vue Test Utils to write component tests.
The key points of these tests are the following. We write more detailed tests for these ― taking into account that these are shared libraries.
- Props
- Rendering based on provided prop value
- Rendering of default value when prop value is not explicitly provided
- Events
- Tests for event handlers inside the components
- Validation logic for forms
// Button.test.ts
import { mount } from '@vue/test-utils';
import Button from '~/components/Button.vue';

describe('Button.vue', () => {
  describe('props', () => {
    describe('disabled', () => {
      describe('false (default)', () => {
        const onClick = jest.fn();
        const wrapper = mount(Button, {
          listeners: {
            click: onClick,
          },
        });
        const $button = wrapper.find('button');

        test('able to click button', async () => {
          await $button.trigger('click');
          expect(onClick).toHaveBeenCalled();
        });
      });
      describe('true', () => {
        const onClick = jest.fn();
        const wrapper = mount(Button, {
          propsData: { disabled: true },
          listeners: {
            click: onClick,
          },
        });
        const $button = wrapper.find('button');

        test('unable to click', async () => {
          await $button.trigger('click');
          expect(onClick).not.toHaveBeenCalled();
        });
      });
    });
  });
});
Mock Data
Creating test data tends to be complicated. We have a factory function that generates test data according to the model type. For example:
type Customer = {
  name?: string;
  email?: string;
}

export function mockCustomer(modification: Customer = {}): Customer {
  return {
    name: 'customer-1',
    email: 'customer-1@example.com',
    ...modification,
  };
}
We write mock data manually not automatically. Although it is tempting to use tools such as intermock which automatically generates data according to the model type, we manually create mock data in order to use meaningful data that is as close to production data as possible. Once the factory functions are defined, they can be reused, so we can efficiently create mock data manually.
Here is an example use case. You can set any value by the modification argument.
import { mockCustomer } from '~/mock/customer';

describe('customer', () => {
  describe('customerToFormData()', () => {
    it('should make a customer form data correctly', () => {
      const customer1 = mockCustomer();
      expect(customerToFormData(customer1)).toStrictEqual({
        formData: {
          name: 'customer-1',
          email: 'customer-1@example.com'
        }
      })

      // Can use any value by `modification
      const customer2 = mockCustomer({
        name: 'customer-renamed'
      });
      expect(customerToFormData(customer2)).toStrictEqual({
        formData: {
          name: 'customer-renamed',
          email: 'customer-1@example.com'
        }
      })
    })
  })
})
2. Integration Testing
Integration Testing is mainly implemented on a per-page basis with each page corresponding to a page component under the pages directory in Nuxt. It tests everything within the page, such as its child components, utility functions, Nuxt middleware and plugins, Vuex Store, etc. We use Cypress and keep the test code in the same repository as the application.
Key Points
Basically, we use Integration testing to test whether the application behaves as expected based on the specification without focusing on implementation details. Ideally, these tests should correspond to the specification and be written in such a way that the expected behavior can be understood just by looking at the test code.
The key points of these tests are the following.
- Rendering
- Initial rendering
- Conditional rendering depending on permission
- Rendering according to API response type
- Rendering when an API error occurs
- Action
- UI reactivity depending on user actions
- API request body upon form submission
- Page navigation
- Validation
- Form validation
The following is a sample code. cy.mock is an in-house custom command that wraps cy.intercept to mock a specific API response with an arbitrary value. By mocking the API, it is possible to test the behavior in case of API errors. Also, since the Integration Tests are in the same repository as the application, the factory function mockCustomer, which was used in Unit Tests described above, can be used here as well.
import { mockCustomer } from '~/mock/customer';
describe('customer detail screen', () => {
describe('rendering', () => {
it('should render a customer info', () => {
// mock
const customer = mockCustomer();
cy.mock(API.GetCustomer, customer);
// assertion
cy.visit('/customers/1');
cy.findByText('customer-1');
cy.findByText('customer-1@example.com');
})
})
describe('action', () => {})
describe('validation', () => {})
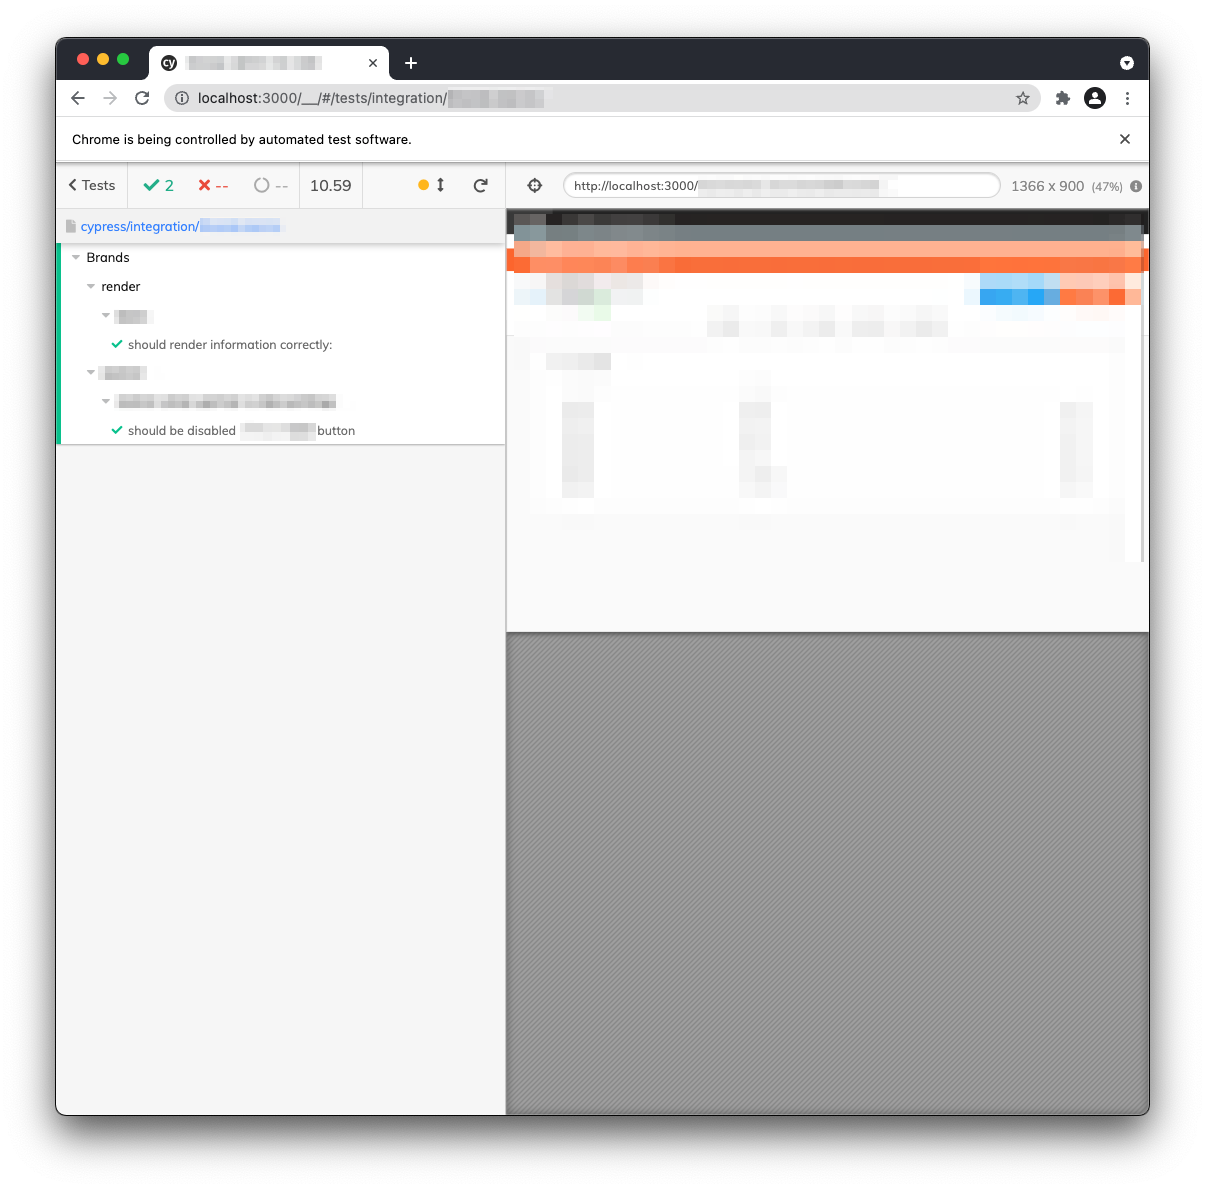
})Cypress
We used to use Vue Test Utils to write Integration Tests. However, it was difficult to run tests because it required a lot of configuration for testing — such as mocking Nuxt-specific processes, Vuex state, and browser-specific processes. Instead, we have shifted to using Cypress, which allowed us to mock only API responses and test the rest of the actual application in a real browser.
Because the Cypress GUI provides you with the details of every process that is running in your application in real time while the tests are running, it’s an easy tool for newcomers to pick up and understand how the code works, therefore speeding up their onboarding process. The GUI could help for debugging as well.
We utilize Cypress as a platform for many kinds of use-cases. The detail is Cypress as a Testing Platform – Merpay Tech Fest 2021 by @Wilson (Video contains Japanese subtitle. The transcript in Japanese is here).
Pros and Cons of Integration Testing
Integration Testing gives us better maintainability of applications that are updated frequently.
Pros:
- Easy to refactor and update npm packages
- We focus on behavior, not on the implementation details, so the tests won’t break when we update implementation.
- It is easy to notice breaking changes of the framework.
- Faster to update npm packages because of less manual check, allowing us to update packages safely and frequently.
- Decrease the need for time and team resources
- Good for onboarding process through reading and executing tests.
- Tests fail when updating implementation so you can understand the scope of impact.
- Even code that you didn’t develop is guaranteed to work in tests, so you can develop without worrying about it.
- Prevent bugs in advance
- Easy to test various kinds of patterns such as screen conditions and behaviors on API errors.
- The number of bugs in the QA phase decreases significantly.
Cons:
- Time needed to write tests
- Writing tests is also writing could, so it adds to the development time of your application, especially if you are writing it from scratch.
- Maintaining these tests (adding/changing) also takes time.
- Keeping up with specification changes
- Making sure that the tests are always consistent with specification changes.
Although there are disadvantages to setting up automated testing, as the scale of an application grows and the number of developers in a team increases, it is definitely beneficial to automate Integration Testing. It reduces the chances of the applications breaking despite having multiple developers working on one application, so it could make your application safer and faster to develop.
3. Scenario Testing
Scenario Testing is testing for all expected behaviors and is performed manually by the QA team. When a feature is added or changed, all patterns are tested exhaustively. In other words, unless a feature is added or changed, it will not be performed again. In addition, the number of scenario test cases is huge and test execution is time-consuming, and the cost of updating them is also significant. Therefore, we have a policy of not automating them.
The difference between Integration Testing and Scenario Testing is the test target. While Integration Testing only tests the frontend application itself, Scenario Testing uses a production-like environment to test all such as backend and infrastructure comprehensively via frontend application.
4. Regression Testing
Regression Testing is a test to check if a change in the implementation has any unexpected impact on the overall behavior of the application. Basically, we automate it by Cypress, and manually test for the cases that cannot be automated due to something. We manage both automated cases and manual cases in the same place by TestRail.
I wrote a post about automating and workflow improvement last year. Now, the workflow has been revamped and we can run Regression Tests via Slack commands.

Key Points
Regression Testing checks for degradation before release and must be executed at every release. We pick up significant test cases from Scenario Testing and automate them. For example, when there are multiple screen rendering patterns based on data state, only one or a few of them should be automated. The test cases are managed using TestRail.

We use Cypress and place test codes in a separate repository. This is because the code owner is the QA team and it is an end-to-end test that includes not only the frontend but also the backend. The QA team is responsible for selecting regression test cases, and over the past year, test automation itself has been done mainly by the QA team.
As for the frontend team, we’re supporting Cypress, TypeScript, CI, and so on. For example, one of the issues that was raised before is that the tests were not stable. More details about stabilization can be found in Frontend E2Eテストの安定化の取り組み by @tokuda109.
Closing
I explained a general overview of each testing approach we have in Merpay frontend. The decision of which tests to automate or not is very important. While there are times that not having any tests at all decreases our development efficiency, there are also times where we write too much test code that these tests end up taking too much of our time. I think it is important to take the following into consideration: the phase of the product that is being developed, the scope of the development, the team resource, and when executing a strategy for doing automated testing.
@fivestar will write a post tomorrow. Look forward to it!


