The 11th day’s post of Mercari Advent Calendar 2019 is brought to you by @damianpasko from the iOS team.
State is a very important word for both SwiftUI and Redux. In this case, it’s not only a buzzword, but it’s also a thing that connects them and letting them work together very well. In this article, I will try to show that the above thesis is truthful so let’s get started!
The Beginning
Redux consists of several elements:
- State that is a single source of truth that contains all needed information for our app.
- Action represents an intention to change the state. In our case, it’s an enum that contains new information that we want to add to the state.
- Reducer is a function that takes an action and current state as parameters and returns a new state. It’s the only way to generate it. It’s also worth mentioning that this function has to be a pure function.
- Store is an object that contains the state and provides all needed tools to update it.
Now, let’s try to implement these things in Swift!
Redux Implementation
In this article, I will be building a simple shopping list app that allows adding, removing and sorting items.
First, let’s define our Item model.
As you can see there is nothing crazy in this model, the id field is needed to conform to the Identifiable protocol and the priority field is just an enum, with a definition as follow:
Now we have everything that is needed to start implementing the Redux part, let’s start with the State.
The State is a simple struct that contains two fields: items and sortType. The first one is a list of items and the second one is an optional field that defines how the list of elements is sorted.
SortType is an enum that is defined like this:
There are only two cases, the date case indicates sorting by the date (descending) and the priority case indicates sorting by the priority (descending). It is also worth mentioning that the sortType field can be nil, which means that the list of items is not sorted at all.
Now we can implement Actions.
There we have three cases, one for each possible state manipulation:
- addItem(item: Item) simply adds an item, that is passed as a parameter to the items list.
- removeItem(at: IndexSet) removes an item from the specified index.
- sort(by: SortType) it sorts the items list by the given sort type.
Let’s implement the Reducer now.
The above function is fairly simple, and works like this:
- It copies the current state.
- Based on an action, it updates the copied state.
- At the end, it returns the new state.
It’s worth to noticed that the above function is a pure function, which is exactly what we wanted to achieve!
The last missing piece of the Redux is the Store, so let’s implement it now.
Implementation of the Store takes full advantage of the ObservableObject protocol, letting us omit a lot of boilerplate code or third party frameworks usage. The AppState is held here with read-only access and it’s using a @Published property wrapper, which means that whenever it will be changed, SwiftUI will be notified. The init method takes an initial state as a parameter with a default value of empty Item array. A dispatch function is the only way to update the state, it replaces the current state with the new one, generated by Reducer, based on an Action that is passed as a parameter.
Now that the Redux implementation is ready, we can start creating the shopping list app.
App Implementation

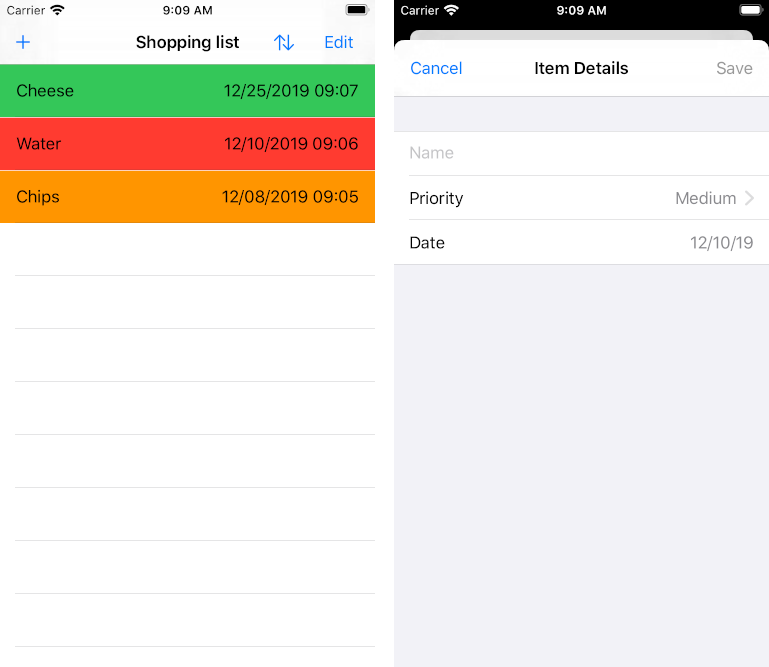
The app itself is simple, it has two screens, the main one with a list of items and the secondary one with a form to add a new item to the list. The cells in the list are colored according to the priority of the item they represent – red cells have high priority, orange cells have medium priority and green cells have low priority.
Let’s start the implementation from the main screen.
The Content View is a standard SwiftUI view. The most important part – from this article point of view – is top part, that contains a store variable, that is injected to the view using the environmentObject modifier, in the SceneDelegate class.
In the same way, any @EnvironmentObject can be passed to any child view in the entire app, and it’s all possible thanks to the Environment feature.
The isAddingMode variable is marked with @State and indicates whether the secondary view is open or not.
The store variable is automatically inherited by the ItemListView and we don’t need to explicitly passed but it has to be done for the AddItemView because it’s presented as a sheet that isn’t a child view of the ContentView.
Now let’s take a look at ItemListView.
It’s a view that is using the List container to present list of items. The onDelete function is using a removeItem action that is execute by using the dispatch function provided by the store. To display a specific item, list is using an ItemView.
This view accepts an item as a parameter and configures itself based on it.
To add an item to the list, isAddingMode need to be change to true to tigger the AddItemView sheet. This is the responsibility of the AddButton.
This view is a simple button that has been extracted from the ContentView for the better code structure and separation.
Let’s take a look at AddItemView:
This is a slightly bigger view, which, like other views, has the store variable. It also has the nameText,
priorityField, dateFiled and isAddingMode variables. The first three variables are needed for binding the TextField, Picker, DatePicker, that can be seen on this screen. The last variable is used to dismiss the sheet. The navigation bar has two items. The leading one is a button that dismisses the sheet without adding a new item, and the trailing one is adding a new item to the list, which is achieved by executing an addItem action. It also dismisses the sheet.
Last but not least is TrailingView.
This view consists of two buttons that are responsible for sorting the list of items and for turning on and off the edit mode. Sorting actions are called using – as always – dispatch function provided by the store.
The Result
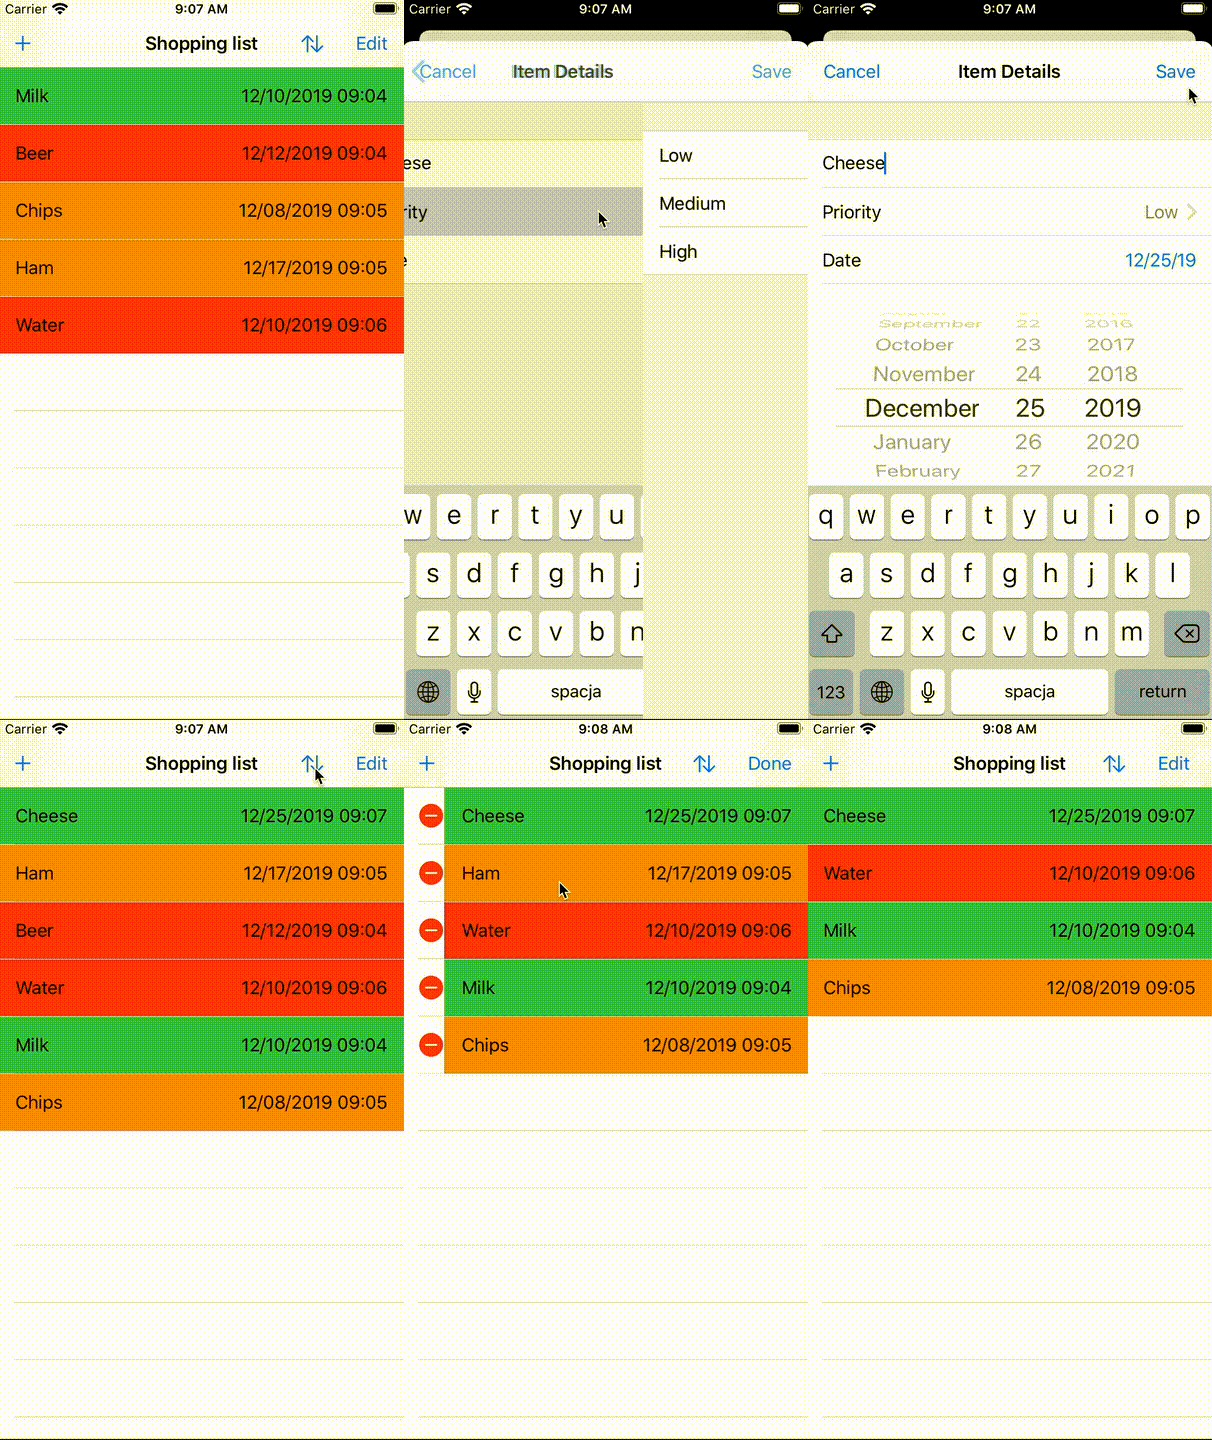
The app is ready and should work exactly as expected. Let’s try to compile and use it. Source code can be found here.

Conclusions
Redux and SwiftUI are working very well together. The code written using both is easy to understand and can be well organized. Another good aspect of this solution is excellent code testability. However, this solution isn’t free from any disadvantages. Memory usage might be high when the state is very complex and performance might not be perfect in some specific scenarios since SwiftUI Views are being updated whenever a new State is being generated. These drawbacks can have a big impact on the quality of the app and user experience, but if we keep them in mind and prepare the state in a reasonable way, the negative impact can be easily minimized or even avoided.
I hope that you enjoy the post and if you are interested in testing, check my next article. Happy Wednesday!
Resources & Useful links
- Redux – A predictable state container for JavaScript apps.
- https://developer.apple.com/documentation/swiftui/state_and_data_flow
- Home | Majid’s blog about Swift development
- QuickBird Studios Blog – We craft highly polished mobile applications that work for your users and your business.
Tomorrow’s blog – the 12th in the Advent Calendar will be written by @kinnerapriyap. Please look forward to it! 😸


